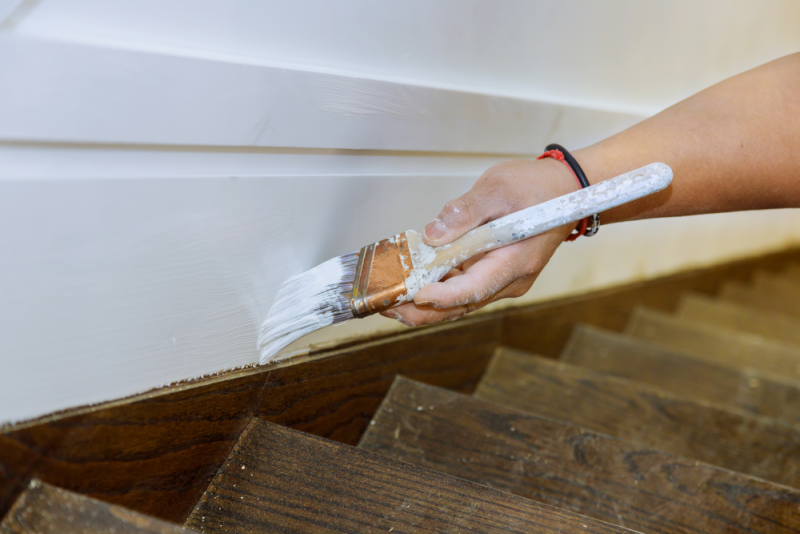
Anyone can paint a room with a roller and a bucket of paint, but to get a professional finish, you need to learn how to cut in. This is the process of painting around ceilings, windows, door frames and other areas that are difficult to reach with a roller.
It’s not as hard as it sounds, but beginners often run into trouble because they don’t have the right tools or they don’t know how to use them properly. In this article, we’ll give you 10 tips that will help you improve your cutting-in technique and produce flawless results every time!
- Before you begin, you need to do the following:
- Use a Dipping Pail
- Gently tap your brush on the pail
- Best paint brush for cutting-in
- Angled Sash brush
- Textured ceiling: Knock off the texture at the edge with a putty knife
- Use painter's tape
- Do you need extra cover? Use a Hand-Masker Dispenser
- Ensure you have the right amount of lighting
- Add Conditioner for Easier and Smoother Brushing!
- Get your brush and paint ready: set… go!
- The key for Cut in: fast + a steady hand
- Load your brush properly
- Hold your brush correctly
- Start at the top
- Meticulously Cut One Wall at a Time for Maximum Precision
- Create a Straight Line along a Ceiling or Moulding
- Gently Wriggle the Brush into those Hard-to-Reach Corners
- Feathered Paint Edge
- Take your time
- Work in small sections
- Apply a light touch with your brush
- Clean up any mistakes
- Wait for the paint to dry before proceeding any further with your project.
- Contact a professional team
Before you begin, you need to do the following:
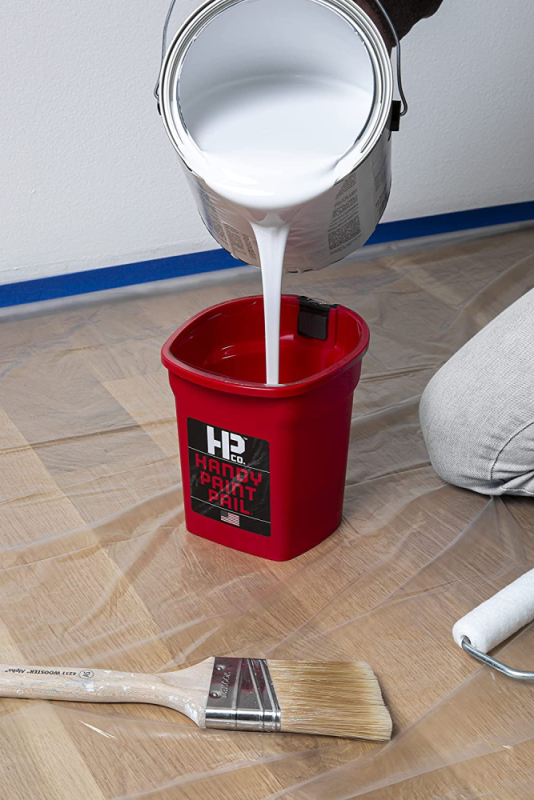
Use a Dipping Pail
Instead of applying paint directly from the gallon can, transfer a small portion to an effective tool known as a dipping pail. A plastic or metal container with handles is ideal for this task, and you could even use an emptied paint can without its rim. Pour no more than one inch of paint into the bucket; it limits how deep your brush goes in and makes clean-up easier if any spills occur.
Additionally, having less weight to deal with is beneficial when painting walls!
Gently tap your brush on the pail
If you want to save time and paint, a smarter painting technique is necessary. Instead of pushing your brush in the can until it’s fully submerged, only go an inch deep so that your bristles are still saturated with more paint.
Furthermore, rather than wiping off excess on the edges of the pail where much pigment gets wasted, just dab both sides against its interior walls for smooth coverage each time! With this method applied consistently throughout your project’s duration, you’ll be able to get even better results faster!
Best paint brush for cutting-in
A high-quality brush can make a world of difference when it comes to painting. It will be easier to control and produce cleaner lines. When cutting in, always use a brush that is shorter than the width of the area you are painting. This will help you maintain control and produce straight lines.
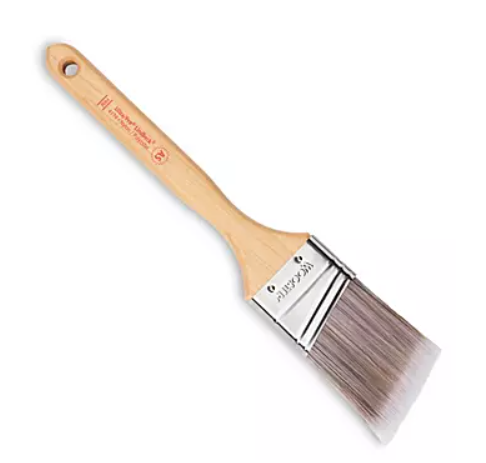
Angled Sash brush
Professional painters can paint with a large, square-edge brush and make it look easy, but many find that angled sash brushes are simpler to control. With an angled paintbrush in hand, you’ll have what you need for straightforward and successful interior room painting.
You may fan the angular tips out to create a thin line of paint and the angle allows access into those tight corners. A 2 ½ inch wide brush is typically perfect for most rooms; however, if your project calls for something smaller such as windows or woodwork, consider purchasing one size down too! It’s much easier to paint accurately with a bit less space to work with!

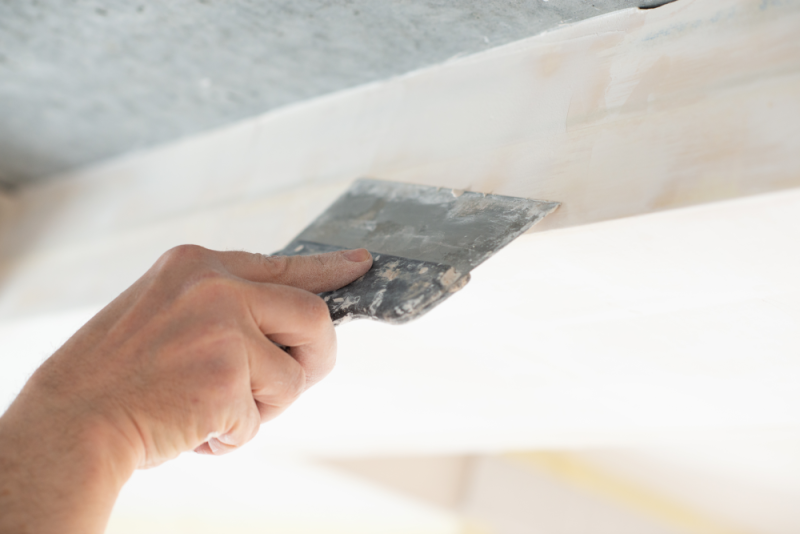
Textured ceiling: Knock off the texture at the edge with a putty knife
It’s almost impossible to paint right next to rough-textured ceilings (a process called ‘cutting in’) without getting paint on the ceiling. Taping off the ceiling doesn’t always work either. The solution? Skillfully use a putty knife at a 45-degree angle along the edge of the ceiling, scraping away texture and leaving behind a groove.
Make sure to clear out this little dent with either an efficient duster or dry brush for optimal results! For a sharp line of paint along the top of your wall, slide your brush bristles into the groove — you won’t even notice that little bit of texture missing. Your ceiling will be perfectly clean and fresh without any accidental splatters!
Use painter’s tape
When painting, using painter’s tape can help you achieve clean lines and prevent paint from bleeding onto other surfaces. This is especially useful when you are painting patterns or designs and other areas that require a perfectly straight line.
Painter’s tape is also useful for protecting surfaces that you don’t want to get paint on, such as floors or furniture. When using painter’s tape, be sure to press it down firmly so that it adheres well to the surface. You may also want to run a utility knife along the edge of the tape to ensure that the line is clean and straight.
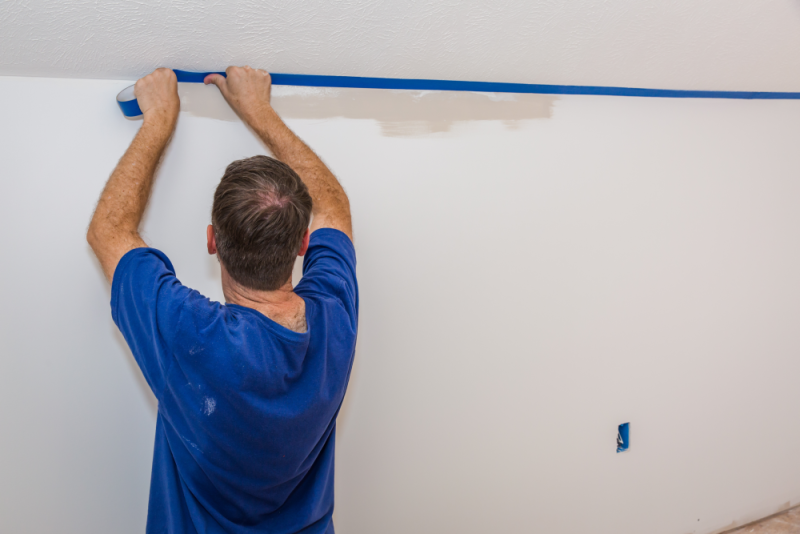
For a neat, uniform finish on trim edges, make sure to apply tape only along the top surfaces.
Once you have perfected the art of cutting in, using painter’s tape is only necessary for the top trim and baseboards — to prevent any paint from splattering onto them. Doing without it saves both time and money; plus, no worries about paint bleeding underneath or ruining your wall when removing it!
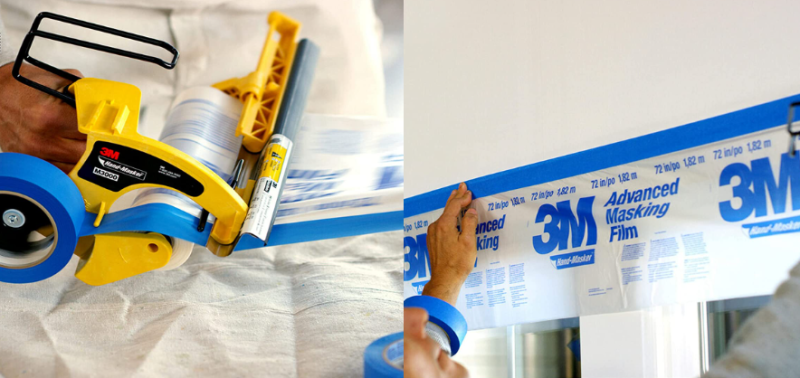
Do you need extra cover? Use a Hand-Masker Dispenser
This convenient tool enables you to save time by allowing you to attach painter’s tape and plastic masking film to it. Allowing for a simple roll-along process, the machine applies both the tape and film quickly so that your surfaces are protected in no time!
Mini Hand Masker
If you want to apply painter’s tape quickly and accurately, use the mini hand masker. Start by firmly sticking down a few inches of the tape on your desired surface, then hold the dispenser against it and slowly slide along as its wheels press the masking onto the wall or mouldings for an even line.
Once done, utilize its built-in cutter at the end of each run for quick and effortless removal, allowing you to finish up in record time!
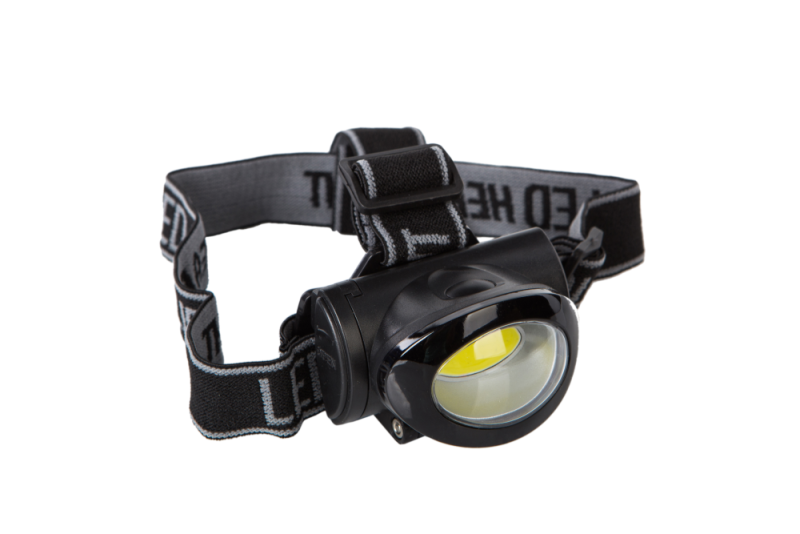
Ensure you have the right amount of lighting
For a precise cut-in line, you must position your body so that the line is in full view and brightly illuminated. A professional tip to ensure success is to use an excellent quality headlamp— it makes all the difference! When cutting along ceilings, get close to the ceiling for optimal visibility of where exactly you should be cutting.
Add Conditioner for Easier and Smoother Brushing!
To ensure smooth, crisp lines when painting your walls, paint professionals advise adding conditioner or extender to the water-based paints you’ll use for cutting in. Simply ask at local paint stores and they will provide what you need.
Furthermore, our expert recommends that one tablespoon of conditioner per cup of paint be added every time the pail is refilled and mixed up thoroughly. This not only facilitates an easier flow while applying but produces superior results with smoother lines as well!
Get your brush and paint ready: set… go!
The key for Cut in: fast + a steady hand
Cutting in along trim that isn’t secured by masking tape requires skill and a steady hand. After you gain the confidence to do it effectively, you’ll never waste time taping up trims again!
Of course, cutting in can be daunting but with practice and patience, anyone can learn how to paint without relying on tapes. To make this more effortless, use a brush with angled bristles as they help uniformly unload paint while cutting in.
Load your brush properly
When you’re painting, it’s important to have a consistent amount of paint on your brush so that you don’t end up with streaks or uneven coverage. To load your brush properly, dip the tip into the paint and then tap it against the side of the can to remove excess paint. This will give you a nice, even coating of paint on your brush without making it too heavy or difficult to control.
Hold your brush correctly
When you’re holding a paintbrush to paint, it’s important to hold it correctly so that you have more control over the brush and can produce better results. To do this, rest your index finger on top of the ferrule (the metal part that holds the bristles) and position your thumb behind the brush. This way of holding the brush will give you more control and accuracy as you’re painting. Remember:
Downward stroke: For a corner
Sideways stroke: For a ceiling or baseboard.
Paintbrushes come in all sorts of shapes and sizes, and each type of brush is designed for specific uses. For example, there are flat brushes, which are good for painting large areas of flat color; round brushes, which are great for detail work; and fan brushes, which can be used to create interesting textured effects. Experiment with different types of brushes to see which ones work best for you and the type of painting you’re doing.

Start at the top
When cutting in around ceilings or door frames, it is best to start at the top and work your way down. This will prevent any drips or runs from ruining your work.
By starting at the top, you can ensure that any excess paint will drip down onto the unpainted surface, rather than onto the painted surface below. This will save you time and effort in the long run, as you won’t have to go back and repaint any areas that were accidentally missed.
Meticulously Cut One Wall at a Time for Maximum Precision
When you have your paintbrush in hand, it can be tempting to cut along all the edges of the room. However, you’ll get a more flawless finish if you take one wall at a time and roll out that wall right away while the cut-in paint is still wet. This technique ensures that both paints will blend seamlessly together, diminishing any potential for lap marks or streaks.
Create a Straight Line along a Ceiling or Moulding
If you need to paint a line with absolute precision, like for ceiling or moulding, start by quickly brushing some paint onto the wall. This pass does not require accuracy; simply unload the brush onto your surface.
Without reloading it again, make a second sweep closer to the desired line with only its tip, slightly fanning it in order to spread an even amount of paint along that path. Depending on how sharp you want it to be, do an additional pass and get that perfect cut-in!
Gently Wriggle the Brush into those Hard-to-Reach Corners
To create a seamless paint job and ensure no missed areas, use the “wiggle” technique! A gentle vibration is all that’s needed to release paint into tight corners and fill in any gaps. Too much wiggling could cause brush strokes and damage your project, so make sure to be light-handed for optimal results.
Feathered Paint Edge
To achieve a seamless blend of colours, take advantage of the ancient “feathering” technique. Once you have achieved the desired cut-in line, feather or thin out its outermost part. Without adding any extra paint to your brush, slightly drag it along with just the bristles in order to disperse and even out any excess ridges of paint or buildup.
This technique will ensure that when rolling on walls, there won’t be visible stripes from where you previously applied those earlier cut-ins!
Take your time
Cutting in when painting can be a bit of a process, but it’s worth taking the time to do it right in order to get a professional-looking finish. Also, when cutting in, always remember to use a smaller brush than you would for painting the rest of the wall. This will give you more control over where the paint goes and help you avoid getting paint on areas where you don’t want it.
Another thing to keep in mind when cutting in is that it’s important to load your brush up with enough paint. Otherwise, you’ll find yourself going over the same area multiple times which can create an uneven finish. It may take a little practice to get the perfect amount of paint on your brush.
Work in small sections
When painting a large area, it is important to work in small sections so that the paint does not have a chance to dry before you are done with that section. This will help to ensure a smooth and even finish.
Cut in small sections (about 2-3 feet) at a time and use a brush or roller to apply the paint evenly. Make sure to overlap each section as you go to avoid leaving any bare spots.
Apply a light touch with your brush
When it comes to painting, there is such a thing as too much pressure. Applying too much pressure to the brush can result in an uneven line, which is why it’s important to use a light touch.
Just enough pressure should be applied to keep the paint flowing from the brush, but not so much that the line becomes uneven.
Too much pressure can also cause the paint to splatter or drip, which is why it’s important to use a light touch when painting. This will help ensure that the paint goes on smoothly and evenly, without any unwanted drips or splatters.
Clean up any mistakes
If you make a mistake while painting, simply use a damp rag to wipe away any paint that’s been applied where it shouldn’t be. This will help ensure that your project turns out looking neat and professional.
It’s important to be mindful of both the type of paint you’re using and the surface you’re painting on. Some paints are more likely to cause mistakes or drip than others. If you’re unsure about which type of paint to use, consult with a professional beforehand.
Once you have the right supplies, take your time and focus on each section evenly. Rushing through the project will only increase the chances of making mistakes. If you need to, take breaks in between sections to avoid getting overwhelmed.
Making mistakes is inevitable when painting, but don’t let them discourage you. With a little patience and practice, you’ll be able to produce beautiful results that you can be proud of.
Let it dry: Once you’re done cutting in, let the paint dry completely before moving on to painting the rest of the room or adding any trim or moulding.
Professional painters understand that mistakes occur, but one must take swift action in order to fix them. A noteworthy solution is utilizing a putty knife with a thin layer of damp cloth around it — gliding the blade across your mistake should help you remove any paint residue effortlessly.
However, be mindful that if you delay too long before applying this technique then more intensive approaches may have to be taken!
Wait for the paint to dry before proceeding any further with your project.
Once you’re done cutting in, it’s important to let the paint dry completely before moving on. This will ensure that your paint job looks its best and that any trim or moulding you add will adhere properly.
Allowing the paint to dry also gives you a chance to fix any mistakes you may have made while cutting in. If you try to paint over wet paint, you’ll likely end up with an uneven finish.
Patience and persistence are key when learning anything new, so don’t get too discouraged if it takes you a while to get the hang of things. With enough practice, you’ll be cutting in like a pro in no time at all. Remember, Rome wasn’t built in a day.
Contact a professional team
A professional painting team has the expertise and experience to ensure that your project is completed on time and within budget. Professional painters will have the right type of paint for your specific project, as well as access to high-quality tools and equipment that can make all the difference in the final result.
Transform your living space into the home of your dreams with Renaissance Painting and Carpentry. Our professional services guarantee quality work for your next paint project, so contact us today to get started on creating a beautiful new look! You’ll be amazed at the transformation in no time!
Our friendly staff is always happy to answer any questions or concerns you may have. We look forward to hearing from you soon!